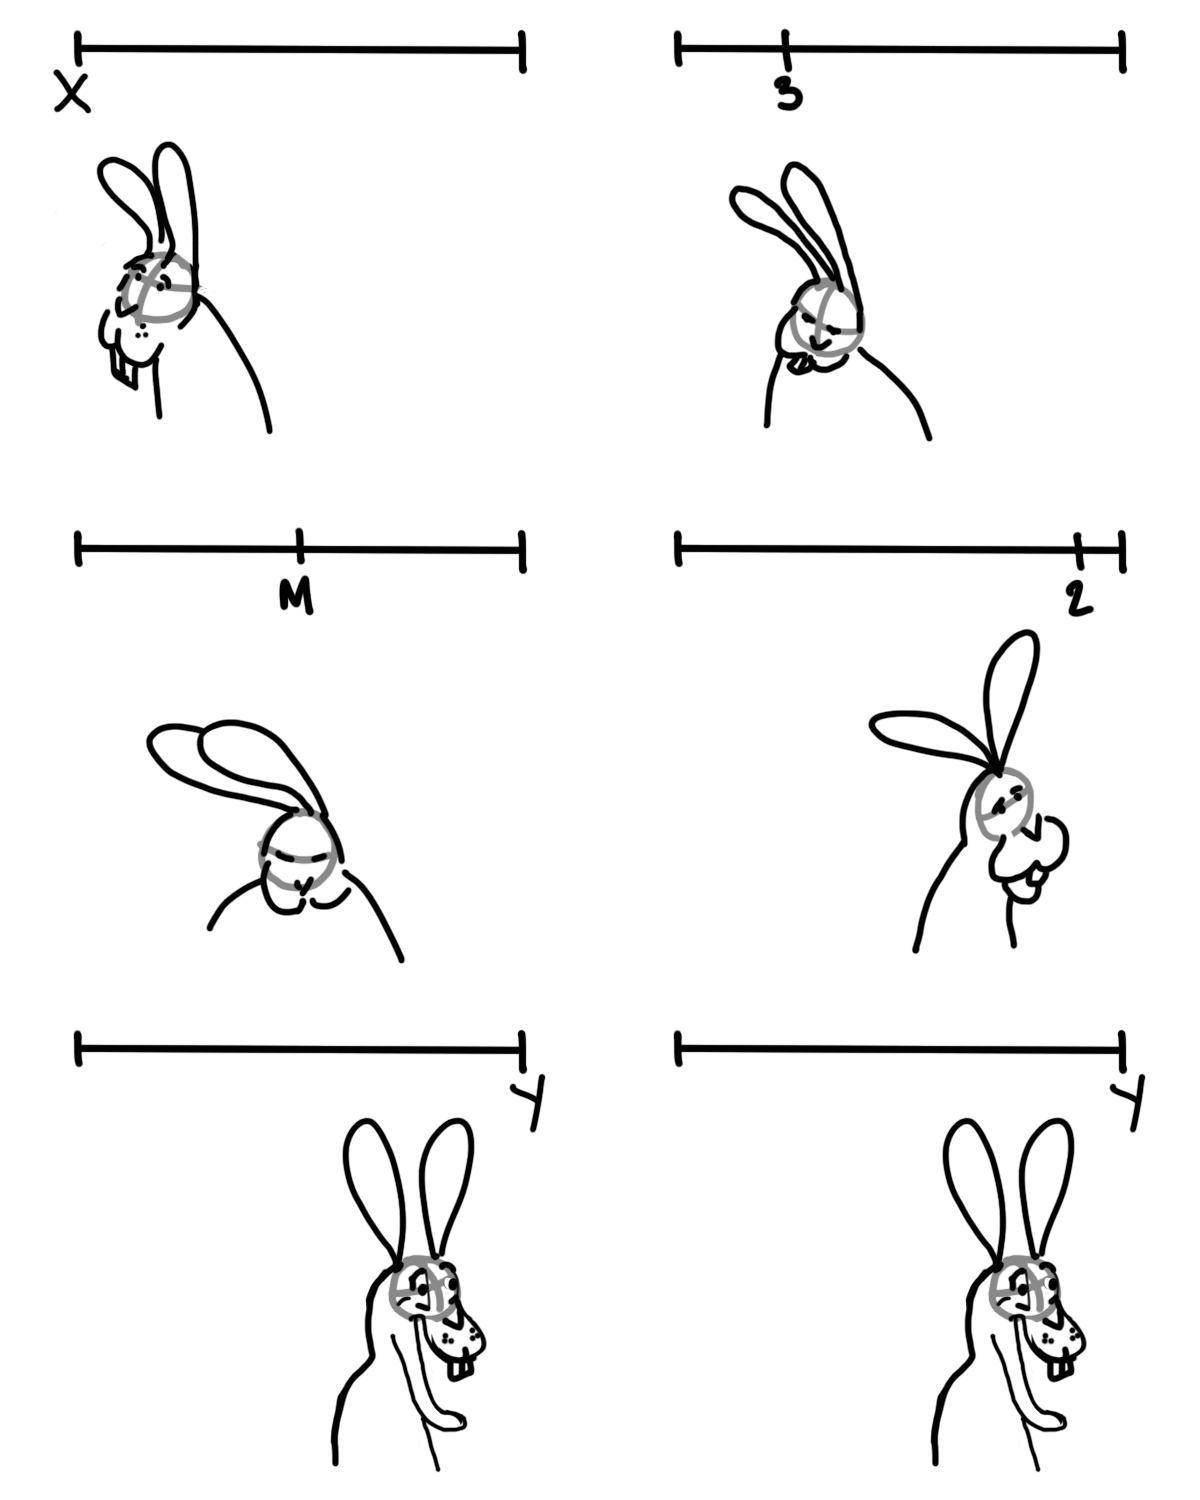
Charlotte gave a presentation today on Animating in Photoshop, what timing and spacing are, and how you can use them to make your animation look natural. We practiced with an animal turning its head. Also she gave us these two links for future learning/reference:
http://www.michaelspornanimation.com/splog/?p=873
 http://www.animationmentor.com/webinar/timing-and-spacing-webinar/
Key Information I didn't know Before:
Timing: Timing is the main story drawings. These are the Narrative, Key Drawings that are cleaner and more well thought out. These need to be held longer than the Spacing drawings, or at least to need to appear to be held longer.
Spacing: Spacing are the in-between drawings. These are what give the animated look.
Animating on 2s: 1 drawing every 2 frames. Most animation is on 2s, although if there is a lot of camera movement or dancing or something that changes a lot, it will be on 1s. "2s" refers to each drawing is held for 2 frames.
Evenness is evil, that's why animators are odd. BAHAHA.
Getting started:
We started with a Timeline. Drawing X on the left, and Drawing Y on the right. These are the Timed Drawings. Between those, there are spacing drawings, M, 1, 2, 3, &4. M is the Midpoint, 1 is the 3/4 and 2 is the 7/8 points. Click here for a diagram. You want to focus your attention in the motion closer to your Timed Drawings, so that they appear to hold longer than the midpoint spacing drawing.
Now, create layers titled "X, 4, 3, M, 1, 2, Y, E" And draw the Timing Drawings on X and Y.
Then go to window>Animation Menu to pull up the timeline. {Note: if you hit the button in the bottom right of the pop up window, it will show the frames on a timeline}
Then go to the pull down menu in that window, and click on "Document Settings" to change the frame rate to 24 frames/sec. Animation is done on 24 Frames per second, based off of the persistence of vision in film footage. ALSO, change the Duration to 0:00:01:00. Duration is set up to be HR: MIN: SEC: FRAMES, so setting it to this will tell PS there are 24 frames in this 1sec.
NOW LET'S ANIMATE!
Click on the M layer, and draw the head halfway through the motion. KEEP IN MIND:
1. the head will dip down, because that is what a head naturally does when it turns.
2. the eyes will shut, because all species blink when they turn their heads.
3. Push the weight toward the direction you are going, and let the features drag behind.
4. Distort as head passes thru, don't have to worry about details until the end.
When drawing any of the spacers, look at both at the frame directly before and after, to get a good inbetween image. These can be very loose, just to show the movement of the key pieces.
After you have X, 4,3,M,1,2, Y Draw E. E stands for "Extra" to push the character slightly past your final drawing.
Then copy your Y layer, and have that be the hold for the remaining of the 24 frames. Theoretically in an animation, when a head turns, it should hold or flip back and forth with E for a 12 frame period.
If you haven't already, make each of these layers last for 2 frames (it should snap into place in PS). in the order of X,4,3,M,1,2,Y,E,Y and turn the Onion skinning on (square with striped circle inside).
I've included the GIF i created quickly in class. YAY! ANIMATING!

I hope that was clear. Comment if it wasn't and I can reword/change things :D

No comments:
Post a Comment